A Cool Yule (Log) for the Daring Bakers

Have you ever decided to tackle a complicated and time-consuming project and announced it to family and friends, only to be met with stares of wide-eyed horror and echoed strains of "Are you crazy or something!"? Well, that's pretty much what happened when I shared my plans to make this month's Daring Baker Challenge, a Yule Log, or Buche de Noel. After seeing that 18 page treatise, er, I mean recipe, Mr. SGCC rolled his eyes back into his head and pronounced, "No freakin' way!". Mini SGCC just got one of those smug, know-it-all, teenaged looks on her face and said "Yeah.....right!".
Hmmph!
I don't know about you, but when someone tries to tell me that I can't do something, it only makes me want to prove them wrong. So, while I secretly harbored much of the same doubts and fears about attempting this project, I was determined to at least give it my best shot! I did, and let me tell you, people. It almost killed me.
This month's challenge is brought to us by the adventurous Hilda from Saffron and Blueberry and Marion from Il en Faut Peu Pour Etre Heureux. They have chosen a French Yule Log by Flore from Florilege Gourmand. Different from the more common Genoise and Buttercream type of Yule Log you are probably familiar with, this frozen version is reminiscent of an ice cream cake, except that it is made with a frozen mousse of some sort, layered around various layers of different fillings. In France, this type of confection is called an entremets, which is loosely translated in English as a "cream dessert".

Perfectionist OCD individuals like me should probably resist the urge to dive into projects like this. With six separate components to prepare and somehow manage to assemble into a single, seamless and attractive unit, I literally worked myself into a panicked frenzy requiring medication and quite possibly, intensive therapy! Reading and re-reading the recipe, my brain was swimming in dread, trying to take it all in. I was convinced that I needed a degree in structural engineering to master this thing.
Where do I begin?
My first dilemma was what kind of vessel to use as my mold. I had a couple of nice loaf pans, but they were rectangular and I wanted my buche to be round. I ordered a fancy (read expensive) Buche de Noel pan from Sur la Table and thought I was set. But, when the pan arrived, it was MUCH smaller than I had expected - barely two inches deep! I didn't see any possible way to get all of the required layers packed into that tiny package. CRAP!

Several of my DB colleagues reported that they had made their own molds using various combinations of PVC pipes, paper towel rolls, foil pans and assorted other things. I decided to go the disposable foil pan route, because I happened to have a few left over from Christmas. I found the biggest wine bottle that I had and molded the foil around it. Then, I trimmed it to fit inside one of my loaf pans. (Using a wine bottle worked out perfectly for me, because by the time I got to this point in the recipe, I already needed a few drinks!) By the way, if you try this yourself, BE CAREFUL! Those %$&*@# cut edges are SHARP!

The first element I prepared was the creme brulee. I decided to keep it simple here and made the vanilla version as written in the recipe. I lined another loaf pan with foil and baked the brulee in that so it would be the proper size and shape to fit into my buche. There was some controversy on the DB boards regarding the correct oven temperature for this. I decided to up the temperature to 260 degrees F. and after one hour, my creme brulee looked set. As directed, I then set it in the freezer until I needed it. I also made a small second brulee to test. After being frozen overnight, it unmolded without incident and tasted really good. (I also plopped a chunk into my morning coffee and ooh la la! It was delicious!)
Next, I made the Praline Feuillete......twice. The praline paste was easy to put together and it came off without a hitch, but the rest? Well, let's just say something got lost in la traduction. It was lumpy, clumpy and Would. Not. Hold. Together. I think I used too many Rice Krispies. The recipe said 2.1 ounces, but that translated into about 4 cups of cereal. The second time, I used half as much and it turned out fine. The finished feuillete reminded me of a Nestle's Crunch Bar. I wonder if I could have saved myself the aggravation and just used a few of those? (I mean, who would know?)

After that, I made the mousse, using milk chocolate instead of dark. My family likes milk chocolate better and so do I. I also felt that the lighter color of the milk chocolate would make a prettier contrast with the other elements in the buche.
This particular mousse requires the making of something called a Pate a Bombe. Pate a Bombe is a term used for egg yolks beaten with a sugar syrup, then aerated. It is the base used for many mousse and buttercream recipes. It makes them more stable, particularly if they are to be frozen, so that they do not melt as quickly or collapse under the weight of heavier items. Making a Pate a Bombe requires boiling sugar syrup to the soft ball stage, which in turn requires lots of Valium for me, for in spite of my dozens of attempts over the years to boil a sugar syrup to the desired "ball stage", I have never successfully done it. Not even once. Not even using a candy thermometer.
Without going into the gory details, suffice it to say that I made that @%$*& Pate a Bombe three times before it didn't bomb - and not before I burned the fingerprints off of my index finger. GRRRR!

Then, I had the bright idea of melting the chocolate for the mousse in my little Wilton chocolate melter. I love that thing! I use it all the time and it does a great job - except this time, my chocolate seized and became all grainy and gloppy. A half-pound of Guittard milk chocolate down the drain - literally! SHIT!
The next half-pound went into the double boiler and after forever and a day, it was suitably melted, smooth and glossy.
Thankfully, there were no issues with the preparation of the Dacquoise. I used hazelnuts instead of almonds and was very pleased with the way it turned out.
The ganache recipe used in the buche was quite different from any I've made before. This one had a caramel base. (Uh oh! Where's that burn ointment!) I must finally be getting the knack of caramelizing sugar, because I only had to make this one twice before being rewarded with a lovely, thick and glossy ganache.
Assembling the Buche de Noel was actually not as daunting as I expected it to be. Once all of the different elements were completed, trimmed and ready to go, putting it all together was kind of easy. When I unmolded my buche, I noticed that there were some holes where the mousse didn't fill in. I did tap down the mold several times while piping it in, but the mousse was pretty thick. I was afraid to tap too much because my loaf pan was made of glass. I could just see myself shattering the pan after all that work! I figured that real logs have plenty of bumps and nicks and that mine would just look more "realistic".
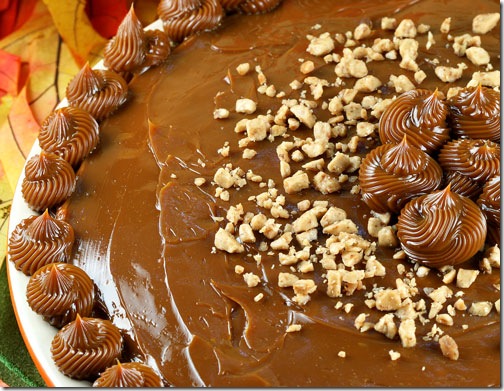
After reading about how many of the other DBers ran short on the chocolate finishing glaze, I doubled the recipe. It was a good call, because I needed it. I could have even used more. Of course, since I already had some gaps in my buche, a totally smooth and shiny finish was too much to hope for. Again, I opted for "realism" and drizzled some chocolate "grooves" over the top of the log. It covered up quite a few blemishes, which then looked like I had put them there on purpose.


(I know it's just condensation, but doesn't the one on the left look like it has snow on top?)
With the leftover bits and pieces of the different elements, I also made a little baby buche. Isn't it cute? Technically, it isn't a log, but more like a mini tree trunk, since it stands upright. I just layered the ingredients in a small cake ring. I like the fact that it is a single serving which would be perfect for an elegant dinner party or a buffet. Much easier to serve.
I garnished my buche with white chocolate leaves that I made using real leaves from my Meyer lemon tree. They are quite easy to make. All you do is brush tempered chocolate on the back side of the leaves and chill or freeze until firm. Then, carefully peel the real leaves away and chill or freeze again. The holly berries were made from some leftover holiday sprinkles that I had. I hand painted the leaves with some green luster dust and voila! Christmas holly! Just make sure that you use leaves that are thin and pliable. I tried this with some Kaffir lime leaves and it was a mess. The leaves were too stiff and the chocolate shattered when I tried to peel it off.

Now, for the moment of truth. How do I feel about this challenge after spending two solid days making and re-making caramel, melting pounds of chocolate, stirring, folding, beating, baking, freezing (and cursing) the numerous elements of this Buche de Noel? Well, I guess I'm torn. Am I glad I did it? Yes.....and No. While I am very proud of myself for actually having completed the challenge, I have to say that I don't think I would ever do it again. Don't get me wrong - the buche was a showstopper and it tasted absolutely divine. But, all of that work and stress pretty much sapped every last drop of "Ho! Ho! Ho!" right out of me! For me, it was a monumental task in an already frenetic time. Just getting the recipe straight took HOURS! And the MESS (not to mention the injuries)!!! Not only was my entire kitchen covered in chocolate, but I was too. (Not a good look for me.) Frankly, I probably would have enjoyed the experience a lot more if it hadn't happened smack dab in the middle of the Holiday Season. Cooking and baking are things that I do to relax, because I enjoy them. When they become another source of anxiety in my life, it defeats the purpose. I'm just sayin'.
Next time, I think I'll just buy my Buche de Noel from Francois Payard. His are magnificent and it would probably be cheaper!
If you'd like to see some more cool Yules from this challenge, check out the Daring Bakers blogroll. You'll find hundreds of delectable and creative Buches de Noel there.
Appréciez et Joyeux Noël!

The following is the order in which I made the different elements of the Buche de Noel. It worked best for me because the first few elements needed much more time to prepare and set up before being ready to use. I was able to multi-task and begin making the latter elements while the former were baking, chilling, freezing, etc.
1) Creme Brulee
2) Praline Feuillete
3) Mousse
4) Dacquoise
5) Ganache
6) Icing
Element #1 Dacquoise Biscuit (Almond Cake)
Preparation time: 10 mn + 15 mn for baking
Equipment: 2 mixing bowls, hand or stand mixer with whisk attachment, spatula, baking pan such as a 10”x15” jelly-roll pan, parchment paper
Note: You can use the Dacquoise for the bottom of your Yule Log only, or as bottom and top layers, or if using a Yule log mold (half-pipe) to line your entire mold with the biscuit. Take care to spread the Dacquoise accordingly. Try to bake the Dacquoise the same day you assemble the log to keep it as moist as possible.
Ingredients:
2.8 oz (3/4cup + 1Tbsp / 80g) almond meal
1.75 oz (1/2 cup / 50g) confectioner’s sugar
2Tbsp (15g) all-purpose flour
3.5oz (100g / ~100ml) about 3 medium egg whites
1.75 oz (4 Tbsp / 50g) granulated sugar
1. Finely mix the almond meal and the caster sugar. (If you have a mixer, you can use it by pulsing the ingredients together for no longer than 30 seconds).
2. Sift the flour into the mix.
3. Beat the eggs whites, gradually adding the granulated sugar until stiff.
4. Pour the almond meal mixture into the egg whites and blend delicately with a spatula.
5. Grease a piece of parchment paper and line your baking pan with it.
6. Spread the batter on a piece of parchment paper to an area slightly larger than your desired shape (circle, long strip etc...) and to a height of 1/3 inches (8mm).
7. Bake at 350°F (180°C) for approximately 15 minutes (depends on your oven), until golden.
8. Let cool and cut to the desired shape.
Element #2 Dark Chocolate Mousse
Preparation time: 20mn
Equipment: stand or hand mixer with whisk attachment, thermometer, double boiler or equivalent, spatula
Note: You will see that a Pate a Bombe is mentioned in this recipe. A Pate a Bombe is a term used for egg yolks beaten with a sugar syrup, then aerated. It is the base used for many mousse and buttercream recipes. It makes mousses and buttercreams more stable, particularly if they are to be frozen, so that they do not melt as quickly or collapse under the weight of heavier items such as the crème brulee insert.
Ingredients:
2.5 sheets gelatin or 5g / 1+1/4 tsp powdered gelatin
1.5 oz (3 Tbsp / 40g) granulated sugar
1 ½ tsp (10g) glucose or thick corn syrup
0.5 oz (15g) water
50g egg yolks (about 3 medium)
6.2 oz (175g) dark chocolate, coarsely chopped
1.5 cups (350g) heavy cream (35% fat content)
1. Soften the gelatin in cold water. (If using powdered gelatin, follow the directions on the package.)
2. Make a Pate a Bombe: Beat the egg yolks until very light in colour (approximately 5 minutes until almost white).
2a. Cook the sugar, glucose syrup and water on medium heat for approximately 3 minutes (if you have a candy thermometer, the mixture should reach 244°F (118°C). If you do not have a candy thermometer, test the sugar temperature by dipping the tip of a knife into the syrup then into a bowl of ice water, if it forms a soft ball in the water then you have reached the correct temperature.
2b. Add the sugar syrup to the beaten yolks carefully by pouring it into the mixture in a thin stream while continuing to beat the yolks. You can do this by hand but it’s easier to do this with an electric mixer.
2c. Continue beating until cool (approximately 5 minutes). The batter should become thick and foamy.
3. In a double boiler (or one small saucepan in a larger one), heat 2 tablespoons (30g) of cream to boiling. Add the chopped chocolate and stir until melted and smooth.
4. Whip the rest of the cream until stiff.
5. Pour the melted chocolate over the softened gelatin, mixing well. Let the gelatin and chocolate cool slightly and then stir in ½ cup (100g) of WHIPPED cream to temper. Add the Pate a Bombe.
6. Add in the rest of the whipped cream (220g) mixing gently with a spatula.
Element #3 Dark Chocolate Ganache Insert
Preparation time: 10mn
Equipment: pan, whisk. If you have a plunging mixer it comes in handy.
Note: Because the ganache hardens as it cools, you should make it right before you intend to use it to facilitate piping it onto the log during assembly. Please be careful when caramelizing the sugar and then adding the cream. It may splatter and boil.
Ingredients:
1.75 oz (4 Tbsp / 50g) granulated sugar
4.5oz (2/3 cup – 1 Tbsp/ 135g) heavy cream (35% fat content)
5 oz (135g) dark chocolate, finely chopped
3Tbsp + 1/2tsp (45g) unsalted butter softened
1. Make a caramel: Using the dry method, melt the sugar by spreading it in an even layer in a small saucepan with high sides. Heat over medium-high heat, watching it carefully as the sugar begins to melt. Never stir the mixture. As the sugar starts to melt, swirl the pan occasionally to allow the sugar to melt evenly. Cook to dark amber color (for most of you that means darker than last month’s challenge).
2. While the sugar is melting, heat the cream until boiling. Pour cream into the caramel and stir thoroughly. Be very careful as it may splatter and boil.
3. Pour the hot caramel-milk mixture over the dark chocolate. Wait 30 seconds and stir until smooth.
4. Add the softened butter and whip hard and fast (if you have a plunging mixer use it). The chocolate should be smooth and shiny.
Element #4 Praline Feuillete (Crisp) Insert
Preparation time: 10 mn (+ optional 15mn if you make lace crepes)
Equipment: Small saucepan, baking sheet (if you make lace crepes).
Double boiler (or one small saucepan in another), wax paper, rolling pin (or use an empty bottle of olive oil).
Note: Feuillete means layered (as in with leaves) so a Praline Feuillete is a Praline version of a delicate crisp. There are non-praline variations below. The crunch in this crisp comes from an ingredient which is called gavottes in French. Gavottes are lace-thin crepes. To our knowledge they are not available outside of France, so you have the option of making your own using the recipe below or you can simply substitute rice krispies or corn flakes or Special K for them. If you do substitute cereal you should use half of the stated quantity, so 1 oz of cereal. I used crushed Rice Krispies. If you want to make your own praline, please refer back to the Daring Baker Challenge Recipe from July 2008 over at Mele Cotte.
To make 2.1oz / 60g of gavottes (lace crepes - recipe by Ferich Mounia):
1/3 cup (80ml) whole milk
2/3 Tbsp (8g) unsalted butter
1/3 cup – 2tsp (35g) all-purpose flour
1 Tbsp / 0.5 oz (15g) beaten egg
1 tsp (3.5g) granulated sugar
½ tsp vegetable oil
1. Heat the milk and butter together until butter is completely melted. Remove from the heat.
2. Sift flour into milk-butter mixture while beating, add egg and granulated sugar. Make sure there are no lumps.
3. Grease a baking sheet and spread batter thinly over it.
4. Bake at 430°F (220°C) for a few minutes until the crepe is golden and crispy. Let cool.
Ingredients for the Praline Feuillete:
3.5 oz (100g) milk chocolate
1 2/3 Tbsp (25g) butter
2 Tbsp (1 oz / 30g) praline
2.1oz (60g) lace crepes(gavottes) or rice krispies or corn flakes or Special K
1. Melt the chocolate and butter in a double boiler.
2. Add the praline and the coarsely crushed lace crepes. Mix quickly to thoroughly coat with the chocolate.
3. Spread between two sheets of wax paper to a size slightly larger than your desired shape. Refrigerate until hard.
Element #5 Vanilla Crème Brulée Insert
Preparation time: 15mn + 1h infusing + 1h baking
Equipment: Small saucepan, mixing bowl, baking mold, wax paper
Note: The vanilla crème brulée can be flavored differently by simply replacing the vanilla with something else e.g. cardamom, lavender, coffee, etc.
Ingredients:
1/2 cup (115g) heavy cream (35% fat content)
½ cup (115g) whole milk
4 medium-sized (72g) egg yolks
0.75 oz (2 Tbsp / 25g) granulated sugar
1 vanilla bean
1. Heat the milk, cream, and scraped vanilla bean to just boiling. Remove from the stove and let the vanilla infuse for about 1 hour.
2. Whisk together the sugar and egg yolks (but do not beat until white).
3. Pour the vanilla-infused milk over the sugar/yolk mixture. Mix well.
4. Wipe with a very wet cloth and then cover your baking mold (whatever shape is going to fit on the inside of your Yule log/cake) with parchment paper. Pour the cream into the mold and bake at 210°F (100°C) for about 1 hour or until firm on the edges and slightly wobbly in the center.
(Tartelette says: You can bake it without a water bath since it is going to go inside the log (the aesthetics of it won't matter as much since it will be covered with other things)....BUT I would recommend a water bath for the following reasons:
- you will get a much nicer mouth feel when it is done
- you will be able to control its baking point and desired consistency much better
- it bakes for such a long time that I fear it will get overdone without a water bath
Now...since it is baked in a pan and it is sometimes difficult to find another large pan to set it in for a water bath, even a small amount of water in your water bath will help the heat be distributed evenly in the baking process. Even as little as 1 inch will help.)
5. Let cool and put in the freezer for at least 1 hour to firm up and facilitate the final assembly.
Element #6 Dark Chocolate Icing
Preparation time: 25 minutes (10mn if you don’t count softening the gelatin)
Equipment: Small bowl, small saucepan
Note: Because the icing gelifies quickly, you should make it at the last minute.
Ingredients:
4g / ½ Tbsp powdered gelatin or 2 sheets gelatin
¼ cup (60g) heavy cream (35 % fat content)
2.1 oz (5 Tbsp / 60g) granulated sugar
¼ cup (50g) water
1/3 cup (30g) unsweetened cocoa powder
1. Soften the gelatin in cold water for 15 minutes.
2. Boil the rest of the ingredients and cook an additional 3 minutes after boiling.
3. Add gelatin to the chocolate mixture. Mix well.
4. Let cool while checking the texture regularly. As soon as the mixture is smooth and coats a spoon well (it is starting to gelify), use immediately.
How To Assemble your French Yule Log
THIS IS FOR UNMOLDING FROM UPSIDE DOWN TO RIGHT SIDE UP.
You will want to tap your mold gently on the countertop after each time you pipe mousse in to get rid of any air bubbles.
1) Line your mold or pan, whatever its shape, with rhodoid (clear hard plastic, I usually use transparencies cut to the desired shape, it’s easier to find than cellulose acetate which is what rhodoid translates to in English) OR saran wrap or cling film. Rhodoid will give you a smoother shape but you may have a hard time using it depending on the kind of mold you’re using.
You have two choices for Step 2, you can either have Dacquoise on the top and bottom of your log as in version A or you can have Dacquoise simply on the bottom of your log as in version B:
2A) Cut the Dacquoise into a shape fitting your mold and set it in there. If you are using an actual Yule mold which is in the shape of a half-pipe, you want the Dacquoise to cover the entire half-pipe portion of the mold.
3A) Pipe one third of the Mousse component on the Dacquoise.
4A) Take the Creme Brulee Insert out of the freezer at the last minute and set on top of the mousse. Press down gently to slightly ensconce it in the mousse.
5A) Pipe second third of the Mousse component around and on top of the Creme Brulee Insert.
6A) Cut the Praline/Crisp Insert to a size slightly smaller than your mold so that it can be surrounded by mousse. Lay it on top of the mousse you just piped into the mold.
7A) Pipe the last third of the Mousse component on top of the Praline Insert.
8A) Freeze for a few hours to set. Take out of the freezer.
9A) Pipe the Ganache Insert onto the frozen mousse leaving a slight edge so that ganache doesn’t seep out when you set the Dacquoise on top.
10A) Close with the last strip of Dacquoise. Freeze until the next day.
OR
2B) Pipe one third of the Mousse component into the mold.
3B) Take the Creme Brulee Insert out of the freezer at the last minute and set on top of the mousse. Press down gently to slightly ensconce it in the mousse.
4B) Pipe second third of the Mousse component around and on top of the Creme Brulee Insert.
5B) Cut the Praline/Crisp Insert to a size slightly smaller than your mold so that it can be surrounded by mousse. Lay it on top of the mousse you just piped into the mold.
6B) Pipe the last third of the Mousse component on top of the Praline Insert.
7B) Freeze for a few hours to set. Take out of the freezer.
8B) Pipe the Ganache Insert onto the frozen mousse leaving a slight edge so that ganache doesn’t seep out when you set the Dacquoise on top.
9B) Close with the Dacquoise. Freeze until the next day.
If you are doing the assembly UPSIDE DOWN with TWO pieces of Dacquoise the order is:
1) Dacquoise
2) Mousse
3) Creme Brulee Insert
4) Mousse
5) Praline/Crisp Insert
6) Mousse
7) Ganache Insert
8) Dacquoise
If you are doing the assembly UPSIDE DOWN with ONE piece of Dacquoise on the BOTTOM ONLY the order is:
1) Mousse
2) Creme Brulee Insert
3) Mousse
4) Praline/Crisp Insert
5) Mousse
6) Ganache Insert
7) Dacquoise
THE NEXT DAY...
Unmold the log and set on a wire rack over a shallow pan.
Cover the log with the icing.
Let set. Return to the freezer.
You may decorate your cake however you wish. The decorations can be set in the icing after it sets but before you return the cake to the freezer or you may attach them on top using extra ganache or leftover mousse, etc...
Transfer to the refrigerator no longer than ½ hour before serving as it may start to melt quickly depending on the elements you chose.

Comments
-Darius
www.everydaycookin.com
Veganpower- Merci!
Engineer Baker- Thank you! I thought the "snow" looked pretty cool in the photos.
Esi & Aran- Thank you both very much!
Jude- Good for you! I couldn't imagine doing all of that tedious work in miniature. I'm too clutzy!
Peter- This is why I love you! You are very sweet! Thank you so much!
Darius- Thanks! I can laugh about it now, but I was NOT a happy camper a few days ago! ;)
S(d)OC- It was certainly daunting! But, I'd invested so much in the ingredients, I had to keep going.
Gretchen- Lol! I'm still scraping chocolate off of the walls. I love the Santas too. :)
Dianne- Thanks! :)
Judy- You're a wise woman! I, on the other hand, must have a screw loose! ;)
Mary & Karen- Thanks!
Renee- Thank you! I wrote each section as I was actually making the log. That way, it was fresh in my mind. After I finished it, I barely had the energy to take photos!
Thank you for tackling this project and convincing me I never need to do one myself. My family thanks you, too.
Happy Stress and Burn-free New Years.
Happy New Year!
Btw, your photos are gorgeous and do it justice! I especially love the ones with "snow" on it!
Happy 2009!
~ingrid
Okay, I could have fun and kid you about a vampire bloody version of the bûche de Noël... but nah! This is too much of a seriously good looking log!
The pictures are gorgeous!!
Sorry about your fingers...go to pastry school, you wont have fingerprints for 10 years.
Your yule log is beautiful...I personally love the whimsical Santa.:) What a great addition!
Happy New Year!
Your log is very beautiful, and yes I agree those picture of the log just came out from the freezer look like snow. Very pretty!
Cheers,
Elra
Way to power through this :)
Wishing you the best year ever. I know it has been a tough one for you and your family and I really wish you the best.